
Neurographic art is a line-based drawing technique where you draw a chaotic, freeform line, then round out every sharp intersection where it crosses itself. That simple rounding action is the whole point, it’s thought to interrupt anxious thought loops by giving your hands a repetitive, structured task, similar to how a fidget habit or a walk around the block can settle a racing mind.
No drawing talent required. No “right” way to do it. Just a pen, paper, and a few minutes.
Below, we’ll cover what neurographic art actually is, why it works as a mindfulness and stress-relief tool, exactly how to do it step by step, some beginner-friendly prompts, real examples of what a finished piece looks like, and the markers worth buying if you want to make this a regular habit.
What Is Neurographic Art?
Neurographic art was developed in 2014 by Russian psychologist Pavel Piskarev, who combined neuroscience concepts with drawing to create what he called a tool for “removing the sense of a limit” in the brain. The name is a mashup of “neuro” (nervous system) and “graphic” (drawing), and honestly, that tells you most of what you need to know.
Here’s the actual process in one sentence: you draw a continuous, wandering line with no plan, then go back and round off every single point where the line crosses or intersects itself.
That’s it. There’s no sketching skill involved, no shading, no perspective to worry about. The “art” isn’t really about the picture, it’s about the repetitive act of noticing an intersection and smoothing it out, over and over, until your page is full of soft, organic curves instead of sharp angles.
Key takeaway: Neurographic art is less “drawing practice” and more “structured fidgeting with a pen”, which is exactly why it works for people who think they “can’t draw.”
Is Neurographic Art Therapy a Real Thing?
Sort of. It depends on what you mean by “therapy.” Neurographic art isn’t a licensed clinical modality the way, say, cognitive behavioral therapy is. But it’s widely used within art therapy and mindfulness-based art therapy (MBAT) circles as a low-barrier grounding exercise, often alongside more established practices like breathwork or body scans.
The broader category it belongs to — mindfulness-based art therapy — has actual research behind it.
A 2017 honors thesis study out of the University of Tennessee at Chattanooga measured mindfulness levels (using the standard MAAS and FMI psychological scales) against people’s engagement with the visual arts, and found that people who spent more time making art tended to score higher on mindfulness measures than those who didn’t.
That’s not proof neurographic art specifically has clinical outcomes; the research on this exact technique is still thin, but it fits a pattern researchers have observed for line-based, repetitive art practices in general.
If you’re looking for a technique to use with clients or students, neurographic art works well as a warm-up exercise before deeper art therapy work, precisely because it requires zero artistic background and gets people out of their heads within a couple of minutes.
Why Does Rounding Lines Feel So Calming?
Here’s the part most articles skip: the calming effect isn’t really about the lines themselves. It’s about what your brain is doing while your hand rounds them off.
A few things are happening at once:
- You’re fully in the present moment. You can’t round off an intersection you drew ten seconds ago and also plan tomorrow’s meetings. The task pulls your attention into the here and now, which is the core mechanism behind most mindfulness practices.
- You’re in a low-stakes flow state. Psychologist Mihaly Csikszentmihalyi, who coined the term “flow,” described it as a state where action and awareness merge and self-consciousness disappears, and repetitive, skill-appropriate tasks (ones that aren’t too hard or too easy) are classic flow triggers. Rounding an endless series of intersections is about as low-friction a flow trigger as drawing gets.
- There’s nothing to get “wrong.” Unlike realistic drawing, there’s no gap between what you intended and what landed on the page. Every rounded line is correct. That removes the self-critical inner voice that usually shows up the second most people pick up a pencil.
If you’ve ever gotten lost coloring in a coloring book or doodling in the margins of a meeting notebook, you already know this feeling. Neurographic art just gives that instinct a slightly more intentional structure.
How to Do Neurographic Art: Step-by-Step
You need three things: paper, a pen or marker, and about 5–10 minutes. Here’s the whole process.
- Start with an intention (optional but useful). Some practitioners begin by naming the feeling or question they want to work through: stress, a decision, or general overwhelm. You don’t have to do this, but it gives the exercise a bit more meaning if you want it.
- Draw one continuous, chaotic line. Don’t lift your pen. Let it wander, cross over itself, loop back, whatever. Don’t plan it; that’s the point.
- Find your first intersection. Look for any spot where the line crosses itself, creating a sharp point or angle.
- Round it off. Smooth that sharp point into a soft curve, so the two lines flow into each other instead of crossing at an angle.
- Repeat for every intersection on the page. This is the bulk of the practice, methodically working through each crossing point until none are left.
- Optional: add color or shading. Once all intersections are rounded, some people fill in the resulting shapes with color, which adds a second calming layer to the process.
- Step back and notice. Look at what you made. Notice how your body feels compared to when you started. That’s the whole exercise.
There’s no “finished” state to chase. You can stop after five minutes or keep going for thirty.
Neurographic Art Ideas for Beginners
If a totally blank page feels intimidating (fair), try one of these starting points:
- The five-minute reset. Set a timer, draw one line, and round every intersection you can before it goes off. Stop when the timer ends, whether or not the page feels “done.”
- The emotion map. Before you start, jot down one word for how you’re feeling. Let that word loosely inform how tightly or loosely you draw your first line.
- The color-fill follow-up. Do a basic rounded-line drawing, then go back with two or three colors and fill in alternating shapes, this adds a second, slower mindfulness pass.
- The decision draw. If you’re stuck on a choice, draw your line while mentally sitting with the decision, then notice which shapes feel more “open” versus “cramped” once you’re done rounding.
- The commute-length version. If you take public transit or have a short break, keep a small notebook and pen just for this; it works in five-minute pockets throughout the day.
Neurographic Art Examples: What It Actually Looks Like
If you’re picturing something like a mandala or a zentangle grid, adjust your expectations, neurographic art tends to look looser and more organic.
A typical finished piece has:
- Soft, rounded, almost cellular-looking shapes rather than sharp geometric patterns
- No symmetry requirement; pieces are often asymmetrical and irregular
- Optional color fills that make the rounded sections look like abstract stained glass or a satellite map of rolling hills
- Line weight that stays consistent (most people use one marker size throughout, rather than varying line thickness)
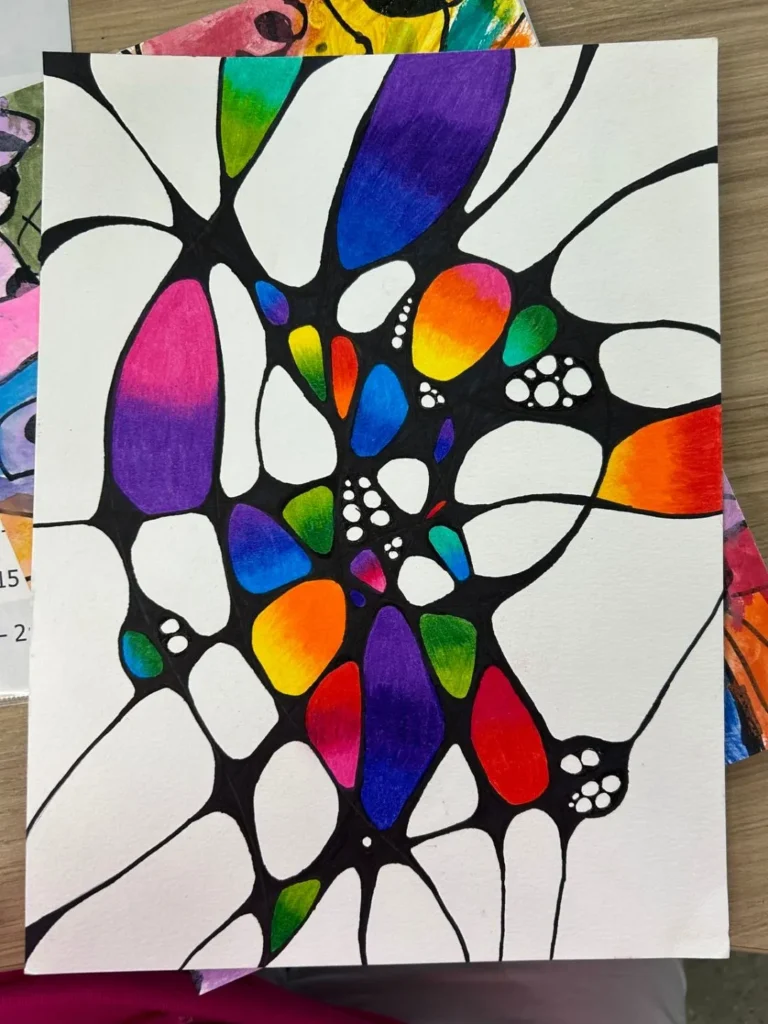
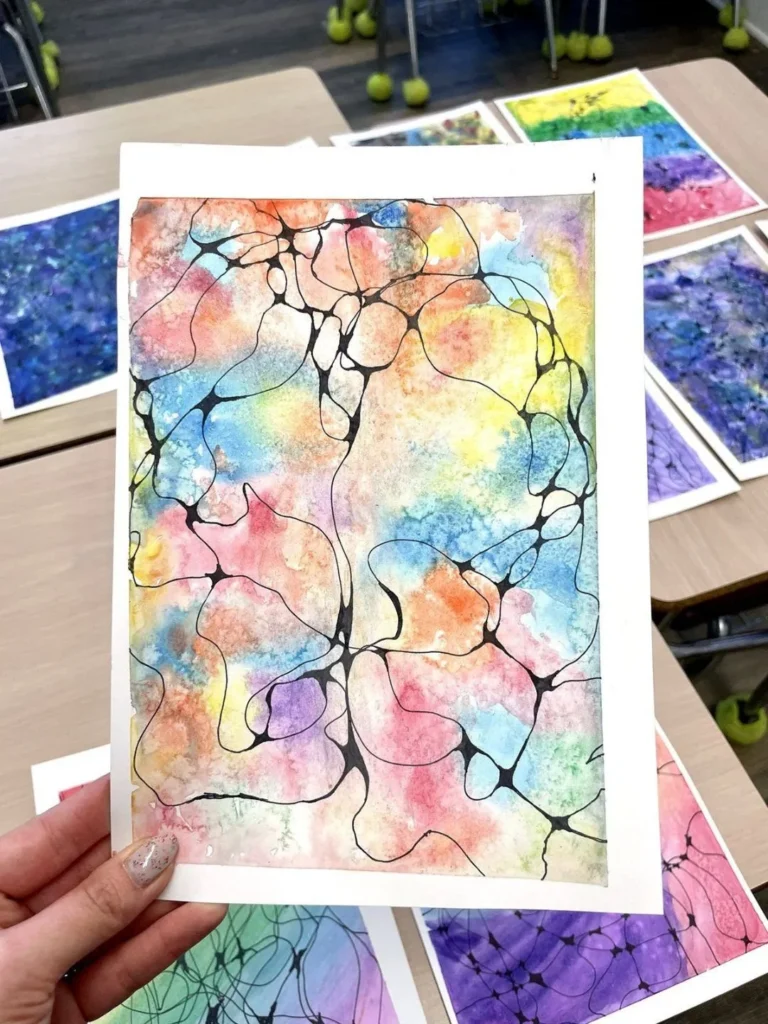
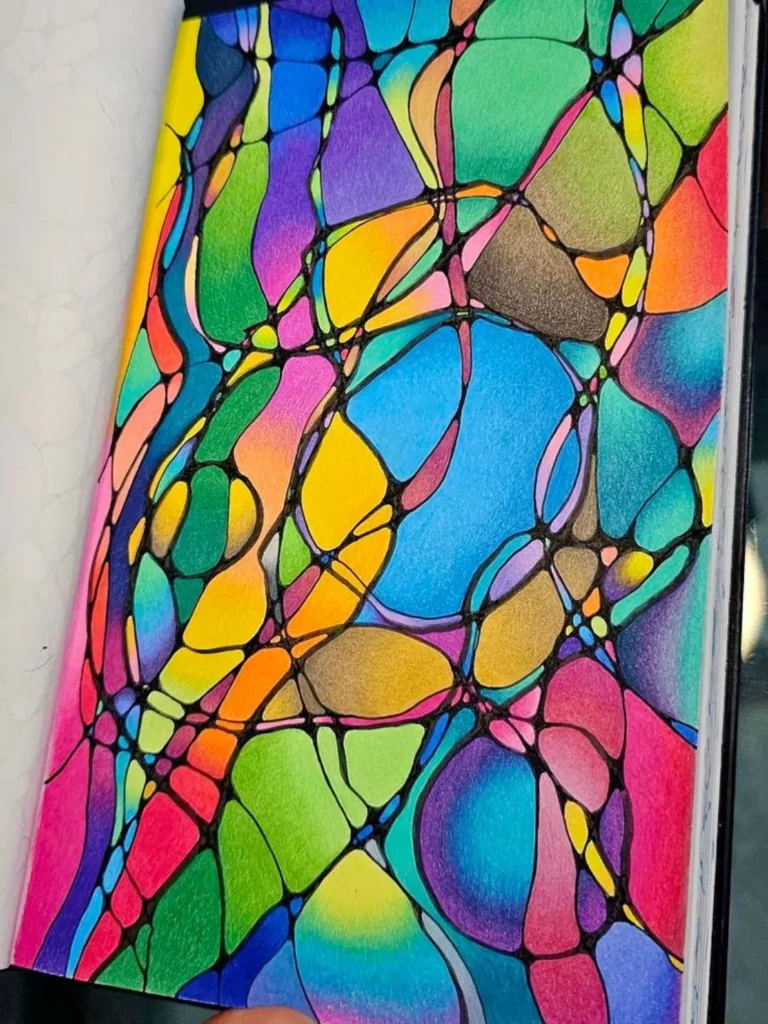
Compared to zentangle, which uses structured repeating patterns within defined tiles, neurographic art has no “pattern library” to learn. Compared to blind contour drawing, there’s no observational skill involved at all. You’re not looking at a subject, just reacting to your own line.
Best Markers for Neurographic Art
You don’t need expensive supplies to start, a ballpoint pen works fine for your first try. But if you want to make this a regular habit, the right marker matters more than you’d think, since you’ll be making a lot of small, repetitive curved strokes.
| Marker Type | Best For | Why It Works |
|---|---|---|
| Fine-liner pens (0.3–0.5mm) | Precise, controlled rounding | Consistent line width makes intersections easier to smooth cleanly |
| Brush pens | Expressive, varied line weight | Lets pressure changes add texture to the rounded curves |
| Alcohol-based markers | Adding color fills after linework | Blend smoothly without warping paper, good for larger fill areas |
| Gel pens | Beginners / kids / low-pressure practice | Glide easily with minimal hand fatigue during long sessions |
| Dual-tip markers | Combining lines and fills in one tool | One end for fine linework, one end for broader color fills |
Our recommendation: Start with a basic fine-liner in the 0.3–0.5mm range. It’s forgiving, affordable, and gives you the control you need to actually round those intersections cleanly rather than fighting a blobby brush tip on your first attempt. Once you know you like the practice, a set of dual-tip markers is the natural upgrade.
Common Mistakes to Avoid
- Planning the initial line. The chaotic, unplanned line is the whole mechanism, if you sketch it out first, you lose the “letting go of control” effect that makes this calming in the first place.
- Rushing the rounding step. The benefit comes from the slow, methodical repetition. Speeding through defeats the purpose.
- Judging the final image. This isn’t meant to be portfolio-worthy. If you’re critiquing your linework, you’ve slipped out of the mindfulness practice and back into performance mode.
- Using paper that’s too thin. If you plan to add color later, thin paper will buckle or bleed through. A slightly heavier sketchbook paper holds up better.
Try It Today
Neurographic art works precisely because it asks so little of you. No supply list, no talent requirement, no “correct” outcome, just a pen, a wandering line, and a few minutes of rounding off the sharp edges.
If this is your first time trying a mindful art technique, it’s also one of the gentlest entry points into the wider world of art-based mindfulness practices. Techniques like art journaling, Zentangle, and Sumi-e all work on the same core idea: give your hands something structured to do so your mind can finally stop spinning.
Grab a fine-liner, draw one messy line, and see what happens when you round it out.
What is neurographic art in simple terms?
It’s a drawing method where you draw one continuous, random line and then round off every point where it crosses itself, creating smooth, organic shapes instead of sharp angles.
Who invented neurographic art?
Russian psychologist Pavel Piskarev developed the method in 2014, drawing on neuroscience concepts to create a drawing-based mindfulness tool.
Is neurographic art the same as neurographic art therapy?
Not exactly. Neurographic art is the drawing technique itself. Neurographic art therapy refers to using that technique within a therapeutic or facilitated setting, often alongside other mindfulness-based art therapy tools.
Do I need to be good at drawing to try this?
No. There’s no drawing skill involved. The initial line is intentionally chaotic and unplanned, and the “skill” is just methodically rounding intersections, which anyone can do.
How long does a neurographic art session take?
Anywhere from 5 to 30 minutes. Most people find 10–15 minutes enough to feel a shift in how they’re thinking or feeling.
Can neurographic art help with anxiety?
Many people use it as a grounding exercise for anxious or racing thoughts, since it demands present-moment attention and gives the hands a repetitive task. It’s not a replacement for professional mental health treatment, but it can be a useful low-barrier addition to a stress-management routine.
What’s the difference between neurographic art and zentangle?
Zentangle uses structured, repeating patterns within a defined tile format that you learn over time. Neurographic art has no patterns to learn, you just draw a freeform line and round out the intersections.